Why is My Aircond Leaking Water? 7 Causes and Fixes
Discover the common reasons why your aircond is leaking water and learn how to fix each issue. From clogged drains to installation problems - we cover it all.
Why is My Aircond Leaking Water? 7 Causes and Fixes
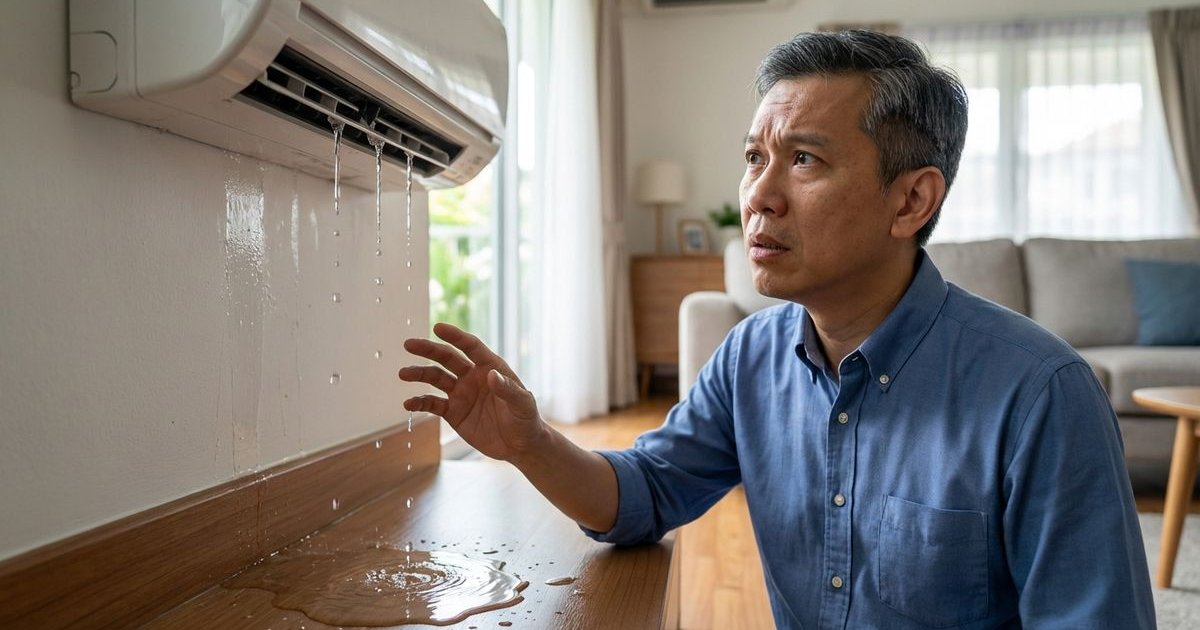
Waking up to a puddle of water under your air conditioner is a frustration many homeowners in Puchong and Kuala Lumpur know too well. It’s not just the mess; that dripping water can quickly damage your parquet flooring, ruin paint, and even create a serious electrical hazard if it’s near a socket.
The reality is that Malaysia’s tropical climate, with average humidity levels hovering around 80%, puts a massive strain on your unit’s drainage system. We see this every single day: a small drip often signals a larger underlying issue that simple wiping won’t fix.
From what we’ve seen in the field, about 90% of these leaks stem from preventable maintenance gaps rather than catastrophic equipment failure. So, we’re going to break down the specific reasons this happens, the “insider” signs to look for, and the practical fixes that actually work.
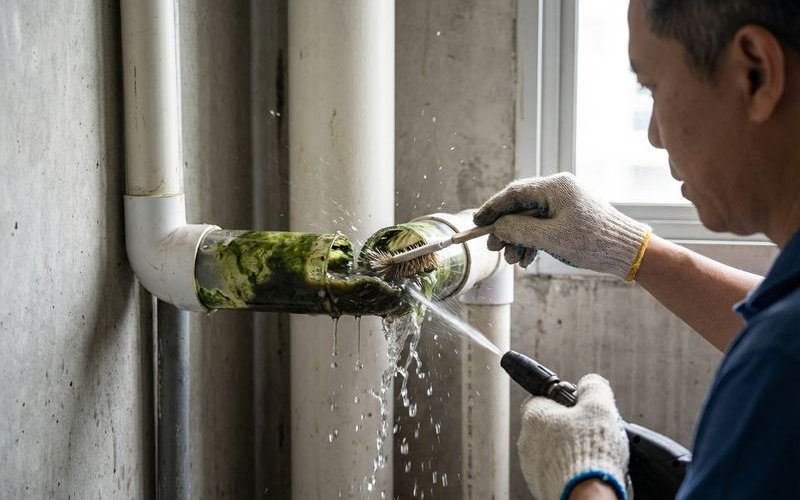
Cause #1: Clogged Drainage Pipe (The “Jelly” Problem)
What’s Happening: The drainage pipe meant to carry condensation away from your indoor unit has become blocked, forcing water to back up and overflow from the tray.
Signs:
- Water dripping from the front of the indoor unit.
- Gurgling or “choking” sounds coming from the AC.
- Zero water dripping from the outdoor drain hose (it should be dripping when the AC is on).
Why It Happens: It’s not just dust; it’s biology. In our humid climate, a bacterial slime known as biofilm grows inside the wet drainage pipes. This “jelly” combines with dust and algae to form a thick, stubborn plug that water cannot pass through.
The Fix:
- High-pressure flush: A standard vacuum often isn’t enough; we use a pressurized water flush during a chemical wash to blast the biofilm out.
- Flexible rod cleaning: For stubborn clogs in concealed piping, a flexible snake tool is required to physically break the blockage.
Prevention:
- Schedule a chemical wash with drainage flushing every 6-9 months to strip away the biofilm.
- Pro Tip: Avoid pouring undiluted bleach down the drain as it can corrode older plastic pipes; use a specialized condensate pan tablet instead.
Cause #2: Dirty Air Filters
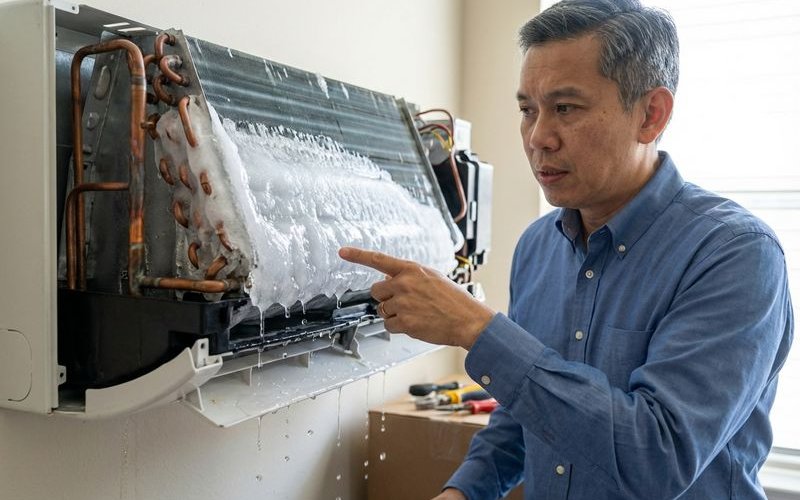
What’s Happening: When filters are clogged with dust, the airflow to the evaporator coil is choked off. The coil then gets too cold and freezes over; when the ice eventually melts, the volume of water overwhelms the drainage pan.
Signs:
- Visible ice or frost on the cooling fins.
- The room feels warm, but the unit sounds like it’s working hard.
- Water drips heavily after you turn the unit off (this is the ice melting).
The Fix:
- Remove and wash the filters immediately.
- Let the unit sit turned off for 2-3 hours to allow any internal ice to melt safely.
- Warning: Do not try to chip the ice away with a tool; you risk puncturing the delicate aluminum fins or copper pipes.
Prevention:
- The “2-Week Rule”: In dusty urban areas like Puchong, we recommend cleaning filters every 2 weeks, not monthly.
- Upgrade to filters with antimicrobial coatings if your household suffers from allergies.
Cause #3: Low Refrigerant (Gas Leak)
What’s Happening: Low gas levels drop the pressure in the evaporator coil, causing it to freeze up just like a dirty filter would. The resulting ice melt leads to a massive leak.
Signs:
- Hissing sounds near the indoor unit (indicating an active gas leak).
- Ice forming specifically on the copper refrigerant lines.
- The air coming out isn’t cold, even on the lowest setting.
The Fix:
- Leak detection is mandatory: Gas is not a fuel that gets “used up”; it operates in a closed loop. If it’s low, there is a leak that must be found and brazed (welded).
- Refrigerant Top-up: Only after the leak is fixed should you top up with R32 or R410A gas.
Insider Insight: A simple “gas top-up” without fixing the leak is a waste of money. The gas will just leak out again in a few weeks, and you’ll be back to square one.
Cause #4: Damaged or Cracked Drainage Pan
What’s Happening: The plastic drainage pan (or tray) underneath the coils has developed a crack, allowing water to drip directly onto the floor instead of flowing into the pipe.
Signs:
- Water drips from unusual spots, often the back or corners of the unit.
- The leak persists even after the drainage pipe has been perfectly cleaned.
- You notice rust stains on the casing of older units.
Why It Happens: Plastic components become brittle after 5-7 years of exposure to the constant cycle of cold condensation and tropical heat.
The Fix:
- Replacement is best: We strongly advise replacing the pan entirely rather than patching it.
- Temporary Seal: Waterproof epoxy can stop the leak for a few days while you wait for parts.
Cause #5: Improper Installation (The “Gradient” Issue)
What’s Happening: Water relies on gravity to drain. If your indoor unit isn’t perfectly level, or if the drainage pipe lacks the proper downward slope, water will pool and spill over.
Signs:
- The unit has leaked since day one or shortly after installation.
- Water pools on only one side of the drainage tray.
- Wall damage appears along the path of the concealed piping.
The Fix:
- Re-leveling: The mounting plate must be adjusted to ensure the unit is level.
- Gradient Correction: The drainage pipe needs a minimum slope of 1% (approx. 1 inch drop for every 100 inches) to ensure smooth flow.
Important: This is common in condos where piping is concealed in concrete. Fixing a bad concealed slope often requires minor renovation work to re-lay the pipe.
Cause #6: Disconnected Drain Line
What’s Happening: The connection between the unit and the drainage hose has come loose, usually due to vibration or poor initial securing.
Signs:
- A sudden, fast leak (pouring rather than dripping).
- Water is coming from the specific point where the pipe exits the wall.
- The leak starts immediately after a recent service or repair.
The Fix:
- Reconnect the line and secure it with a heavy-duty cable tie or hose clamp.
- Wrap the connection point in insulation tape to prevent future sweating.
Cause #7: Condensation in High Humidity
What’s Happening: Sometimes the unit isn’t “leaking” from the inside; instead, the exterior casing is sweating because the room is extremely humid and the unit is too cold.
Signs:
- Water droplets form on the outside of the plastic casing or louvers.
- It happens mostly on rainy days when humidity hits 90%+.
- The drainage pipe is flowing normally.
The Fix:
- Fan Speed: Increase the fan speed to blow condensation off the louvers before it drips.
- Insulation: Ensure the copper pipes behind the unit are fully wrapped with Armaflex insulation to prevent the cold pipes from sweating against the wall.
Quick Troubleshooting Guide
| Symptom | Likely Cause | Urgency |
|---|---|---|
| Water dripping from front | Clogged Drainage (Biofilm) | Medium |
| Ice visible + water leaking | Dirty Filter or Low Gas | High |
| Hissing sound + warm air | Gas Leak (R32/R410A) | High |
| Leak immediately after install | Improper Slope/Gradient | High |
| Droplets on outside casing | High Humidity (Sweating) | Low |
When to Call a Professional
Call immediately if:
- Water is dripping near electrical sockets, switches, or TV units.
- You see ice formation on the coils or pipes.
- The leak is heavy and continuous, risking damage to flooring.
Can wait a day or two if:
- It is a very slow drip and you can catch it with a bucket.
- The unit is cooling fine, but sweating slightly on the outside.
Preventing Future Leaks
- Chemical Wash (Every 6-9 Months): This is the only way to fully remove the biofilm “jelly” from the tray and pipes.
- Bi-Weekly Filter Cleaning: In KL’s dusty environment, monthly isn’t enough.
- Water Test: Once a quarter, pour a small bottle of water carefully onto the coils to ensure it drains out the back hose smoothly.
- Listen to Your Unit: Gurgling sounds are an early warning system—call for service before the water overflows.
Our Water Leak Solutions
At AC Service Bro, we specialize in fixing these exact issues for Puchong homeowners without the hidden fees.
- Chemical Wash with Drainage Flush: RM130 - RM160 (depending on HP). Includes full biofilm removal.
- Diagnostic & Leak Check: RM50 (Waived if you proceed with repair).
- Gas Leak Repair: Quoted on-site based on leak location (includes brazing and refill).
Stop the Drip Today
Is that dripping sound keeping you up at night? Don’t let a small leak turn into a ruined wall. WhatsApp us for quick diagnosis and repair in Puchong.
Related Service
Learn more about our ac repair service